Live Streaming a wedding from your phone is easy, affordable, and DIY-friendly. There are multiple reasons to be interested in doing this yourself, so I’ll make sure that I’m not wasting your time.
Let’s jump right in.
- A smartphone or tablet
- An internet connection
- A live-streaming app: EventLive
- Recommended: a small tripod
Having a small tripod will help you provide a better experience for viewers at home. If you don’t have one, you can hold the mobile device in your hands, but the results won’t be as good.
For occasional live streamers, I recommend this small tripod. It includes everything you need for 26 USD, even a smartphone mount.
You should consider live streaming your wedding if:
- You want to invite people who would love to be there but cannot attend due to health reasons, work schedules, complicated travel, or similar reasons
- You want to invite people that live in different cities, states or countries from yours
- You have a limited budget and cannot afford to invite every single person you’d like to
- You want to keep your wedding intimate but still share your special day with your loved ones at home
- You want to have a beautiful video of your wedding day but don’t want or can’t afford to hire a videographer
- You want to be able to experience your wedding day from a different perspective and watch a replay of your ceremony over the years
If you connected with any of the points above, I’m sure that live streaming your wedding day is the best decision you can make.
Who is this live streaming guide perfect for?
- Wedding couples
- Wedding guests
- Planners or Venues
- DJs
- MCs
- Photographers
- Videographers
This guide is not for you if you want to live stream your event using a camera, GoPro, or similar equipment.
It’s also not for you if you’re looking for Facebook or YouTube live streaming, as the solution I’ll be showing you today is a premium experience for your viewers, compared to social media platforms.
As a quick introduction, here’s how live streaming works:
Just like the regular camera on your phone, you can open a live streaming app, set your phone on a tripod, and press record. The video will be automatically converted into a website that can be seen by your loved ones on any mobile device, computer, or TV.
In order to do that, you have to download and install an app called EventLive. It allows you to share the wedding in real-time with your friends and family on a beautiful viewing page. They can access with a single click, without remembering passwords or signing up.
You can download the app for iOS or Android.
Here’s what the app looks like:

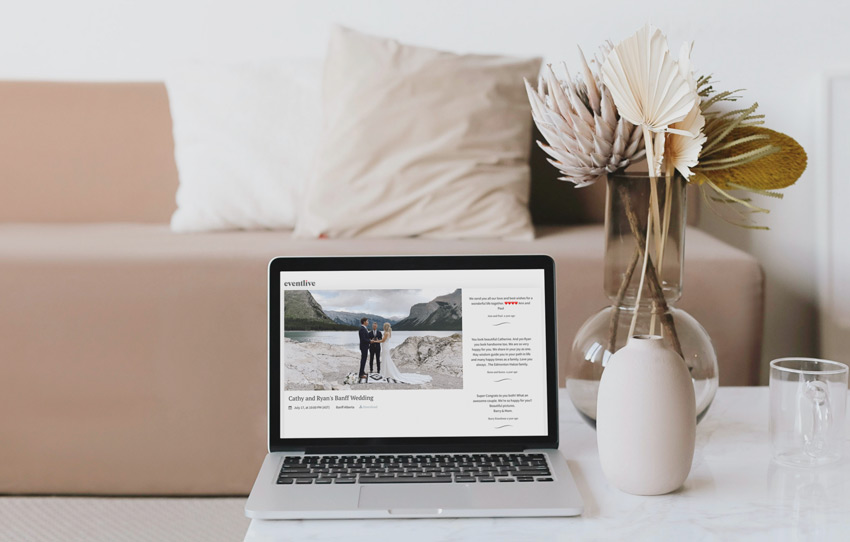
And this is what your family and friends will see:

The app is so intuitive that you will immediately understand how things work, but I still want to guide you on the following steps, to show you how simple it is.
Try the app before you commit
Since EventLive is all about excellent customer service, you can test the app unlimited times before you decide to use it for your wedding day.
Tests can be created within seconds, and you can share the test page with someone or open it on another device. If you’re wondering if your family will be able to watch, this is a perfect opportunity to see how simple the One-Click system is.
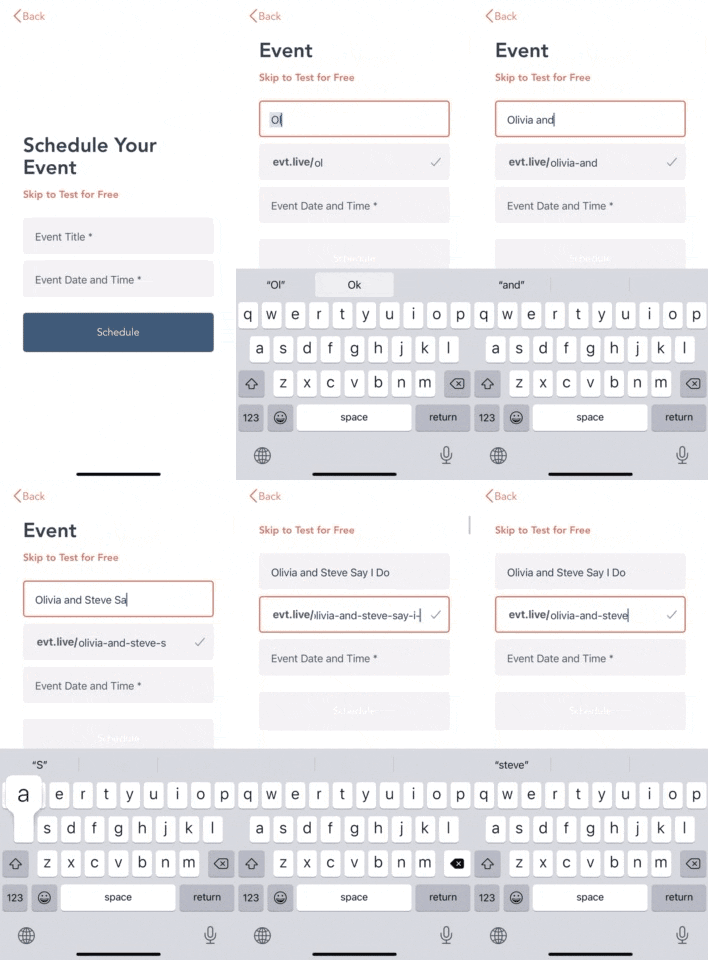
After installing the app, you will be prompted to create an event.
All you need to do is type your event name, date, and time. The app will automatically detect your time zone, but you can change it if your wedding is at a destination with a different time zone.
While you type your event name, the app will automatically generate an Event Page for you, which you can customize like this:

Before inviting guests, you should spend a couple of minutes customizing your wedding page.
Amongst your options, you can decide whether to include a Digital Guestbook, a live Chat, a Cover Photo, or even a Slideshow. On top of that, you can add Gift Registry, Wedding Website, Wedding Program, or any other relevant links to your viewing page.
Let me show you a few examples of each of these elements, real quick:
Digital Guestbook
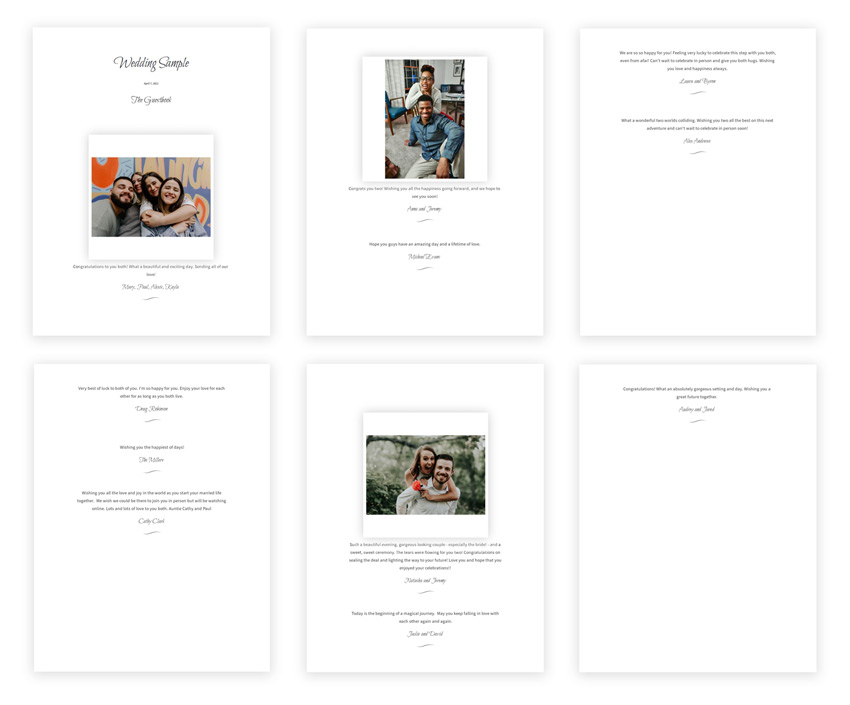
The Digital Guestbook is a very neat feature that you will cherish forever. Alongside your wedding video, you will be able to Download your Guestbook, including images that your virtual guests uploaded on your wedding day.

You can also add a Pinned Message on top, to communicate to your guests the importance of being there for you on such an important moment of your lives. The Pinned Message will stay on top of the guestbook, so you can add timeline or any other important information there.
It could look like this:

Live Chat
For the ones who prefer to give guests the opportunity to chat in real-time during the event, the Chat feature is a great add-on.
Personally, I prefer the Guestbook option for weddings, as individuals usually leave thoughtful messages for the bride and groom. The chat can also be downloaded, but I think that the Guestbook makes a better token of your wedding day.
Cover Photo
This is the perfect spot to showcase your love with a picture of the two of you. If you have a pet, we can’t think of a better place to show your furry baby.
The cover photo will be seen by your guests while they wait for the event to start, and when they access your event page prior to the event. It will be replaced with your live stream as soon as the event starts.
Cover Video
Do you have a slideshow of your engagement photos? What about a small video of the two of you? If you have a clip to show, this is the perfect opportunity to use it.
Just like the Cover Photo, the video will be replaced with the actual live stream when the event begins.
Adding Gift Registry, Wedding Website, and Other Links
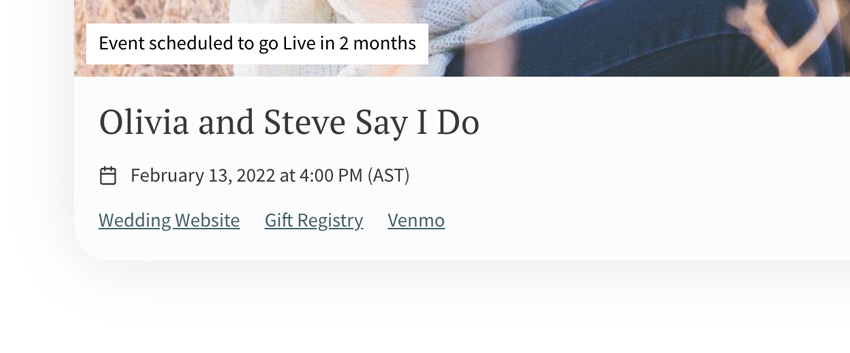
Adding links is extremely simple yet very useful. You can show important information to your virtual guests without asking for things in person, such as Cash Apps, or Gift Registry pages.
Many couples also use this to share their wedding website, and event videographers use this to share the event program so they can pause and resume the live stream when needed. You could do that too!
EventLive has an attachment feature that allows you to Upload a File and see it as a link underneath the event name.

You can add multiple links to your Event Page, but I think three is a good number to keep things organized and looking great.
Now that you tweaked and personalized your event, it’s time to continue with the process.
EventLive allows you to invite guests to your event using two different methods that can be used simultaneously.
Share your event link
The first one involves sharing your custom event link with friends and family. You can send it over private messages such as Facetime or Whatsapp, or even paste it on groups or Social Media. You should be aware that anyone with the private link will be able to attend your virtual wedding, unless you set a password.
Sharing your link only takes a few minutes, and you can invite as many people as you want. Your guest count can be endless and they’d still be able to watch your wedding live.
Type or upload their emails
The second method consists of adding your guest emails to the EventLive platform, so they get automatically notified before the event starts, and as soon as you go live. This method becomes fairly simple if you create a CSV list of emails and upload it on your Guest List section.
The best part about this method is that you can use it for those individuals that you do not want to miss the event for anything in the world, such as grandma, or any family member that couldn’t make it to your wedding.

Depending on the Privacy settings you choose, your event can be seen by anyone with the private link or anyone who has the password to join.
Since your event is private and cannot be found unless you share it, adding a password is usually not necessary. You can opt to add one if there are certain people that you’d prefer to keep away from your wedding or if you don’t want guests to be able to watch the replay, for example.
Besides that, anyone in any country can access and watch your wedding day with a single click.

EventLive doesn’t have any restrictions on the number of viewers or locations that can access an event, no matter how far they are.
It might look scary at first, but this is the easiest thing you’ll ever do.
When you arrive at the location, create a test event within the app and check for the “Good Signal” indicator. If it’s green, you’re good to go. If it changes color or gives you a warning, you might want to try a different internet connection.

When using mobile data, make sure that your carrier doesn't apply data caps after certain usage and that you have an unlimited plan.
Next, open the EventLive app, select your event, and press Go Live.


.svg)


